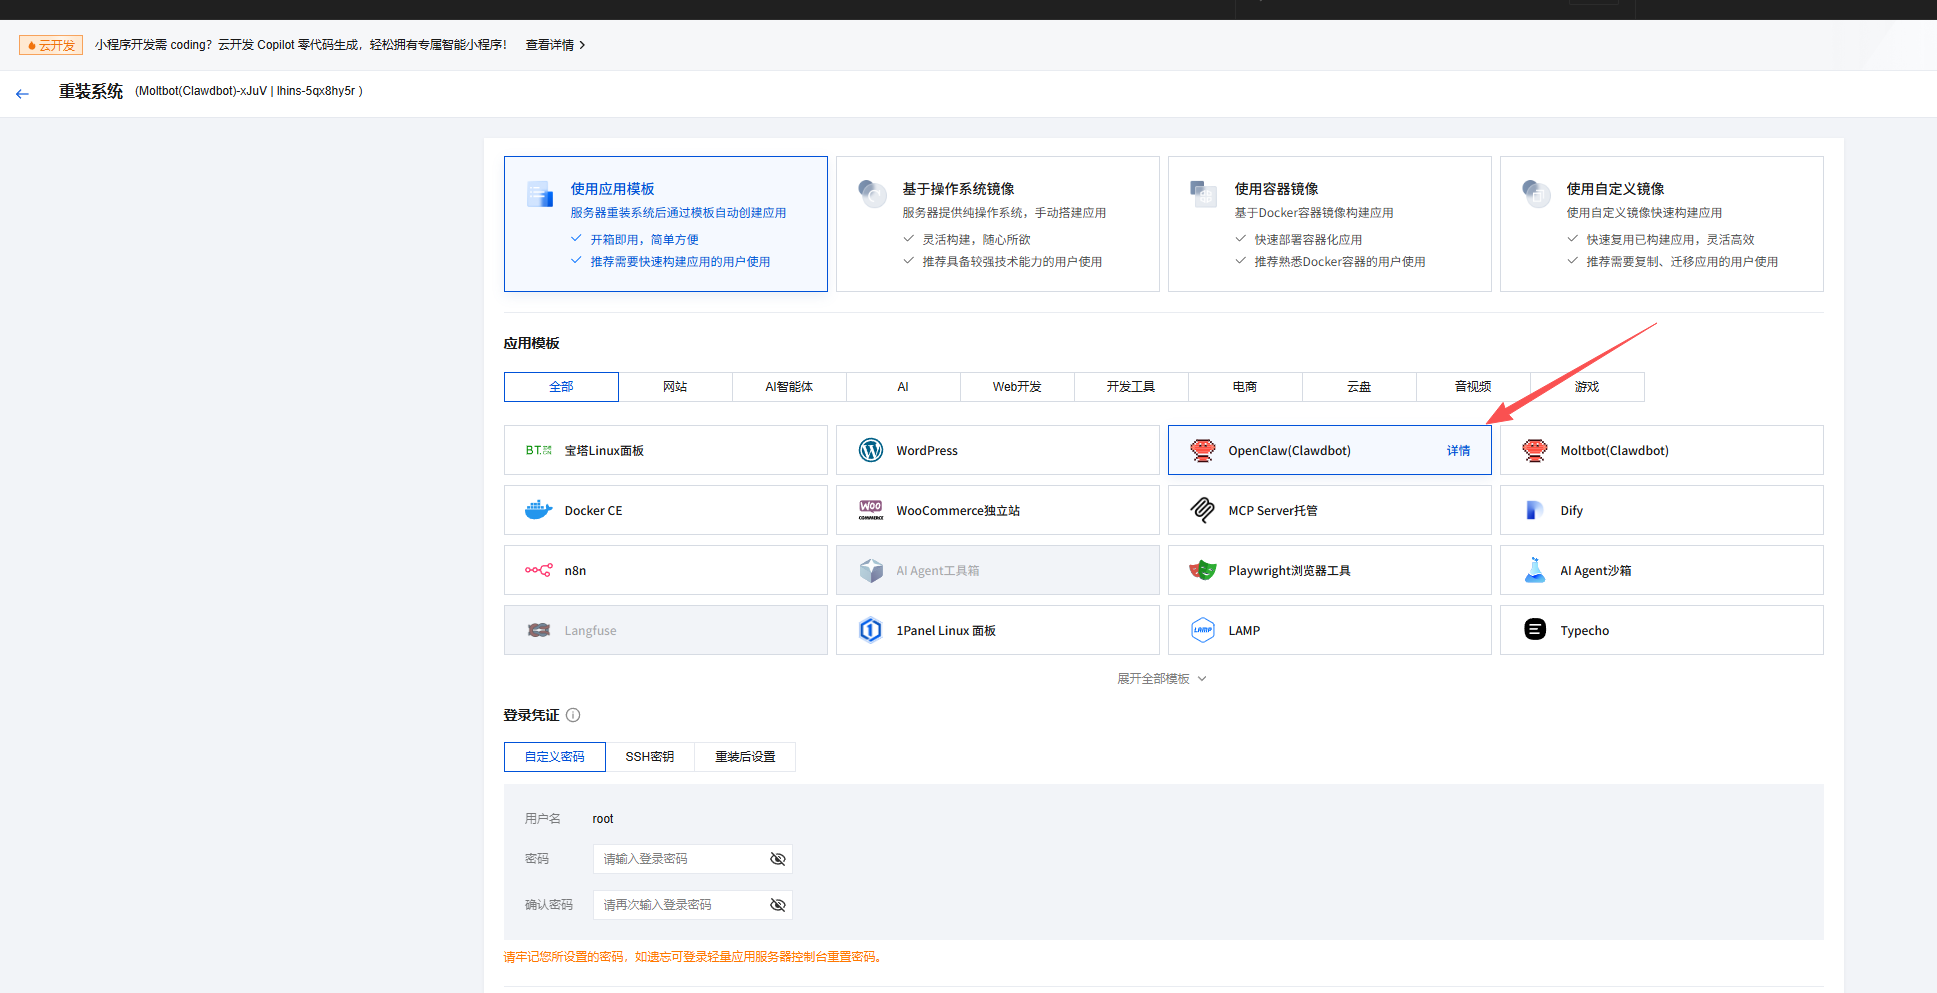
Quick Configuration of OpenClaw
After purchasing a server, environment setup is the first step in using OpenClaw. Because OpenClaw depends on multiple languages such as NodeJS, Swift, Kotlin, and related dependency libraries, manual configuration is cumbersome and prone to version compatibility issues. Therefore, it is recommended to use the Tencent Cloud application template first — this template already includes the full runtime environment and the OpenClaw core program, allowing you to skip dependency installation and significantly improve configuration efficiency.
Note that even if the system installation is completed through the application template, OpenClaw cannot be used directly. All subsequent configuration must be completed through the terminal command line. Only after finishing the configuration can you start using OpenClaw.
Therefore, be sure to follow the steps below carefully to avoid configuration failure caused by missed operations.
When reinstalling using the template, please use OpenClaw. Moltbot does not support Feishu.
In the server management interface, find the login button to enter the command terminal, or open port 22 and log in using your own shell.

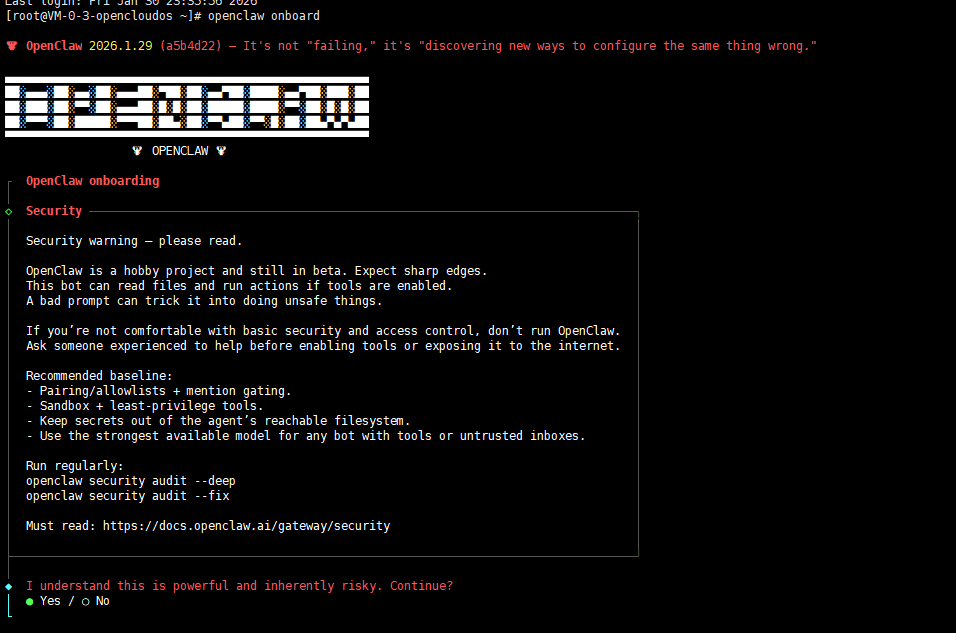
Next, run the command to start the configuration wizard and follow the prompts step by step.
openclaw onboard
Tip: If settings were not saved during configuration or you need to modify existing configuration items, you can run the
openclaw configurecommand to re-enter the configuration interface.
◆ I understand this is powerful and inherently risky. Continue?
Operation instruction: Use the left and right arrow keys to switch between Yes/No options. Selecting Yes indicates that you understand the permission-related risks of OpenClaw and agree to continue the configuration.
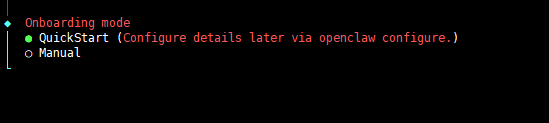
◆ Onboarding mode
When entering the Onboarding mode selection screen, first-time users are recommended to choose QuickStart mode. This mode focuses on “minimal configuration + fastest deployment,” skipping unnecessary configuration items and quickly completing the basic OpenClaw deployment.
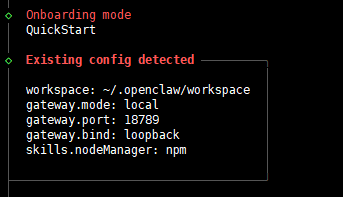
◆Config handling
For the first configuration,
Use existing values,Update, orResetare all acceptable.
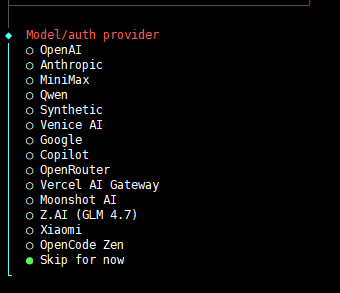
◆Model/auth provide
Configure the model you want to use. You can configure it directly here, or handle it later through the configuration file.
Since the author uses the domestic moonshot model, but the OpenClaw configuration defaults to international endpoints which may cause incorrect API addresses, the author selects
Skip for nowto skip LLM configuration for now and will configure the model separately later.

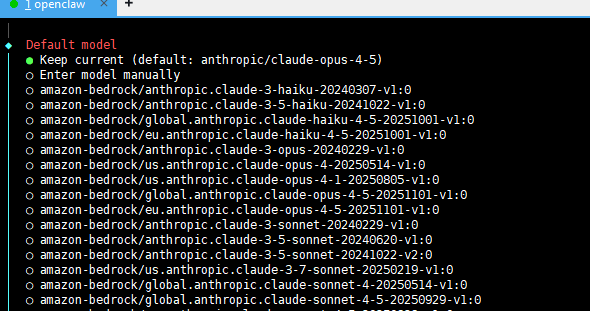
◆Default model
When entering the Default model selection screen, you can choose any model as a temporary placeholder. This configuration will later be overridden by modifying the configuration file and will not affect the final usage.
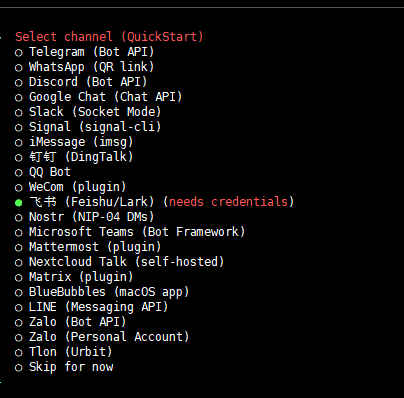
◆Select channel (QuickStart)
Configure the chat application you want to use. If using Feishu, fill in the parameters as required. You can also select
Skip for nowto skip it for now. The author will explain how to configure it in a separate section later.
◇ Skills status
Configure skills. You can select
Yesand install some commonly used tools according to the prompts.
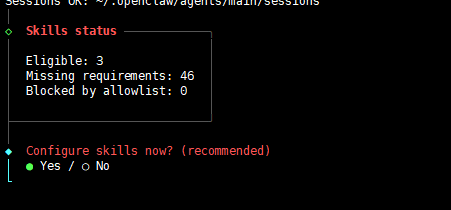
When reaching the Install missing skill dependencies step, press the space key to select the skills you want to install by default. Multiple selections are allowed.
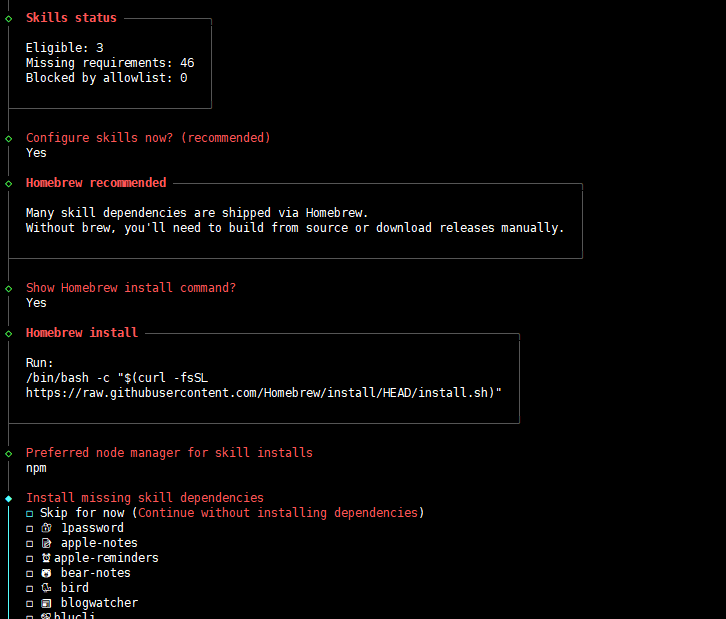
Other configurations are not needed for now, so they can be ignored.
Confirm and restart the service.
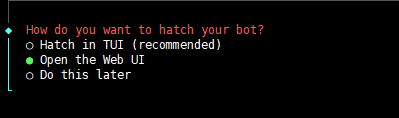
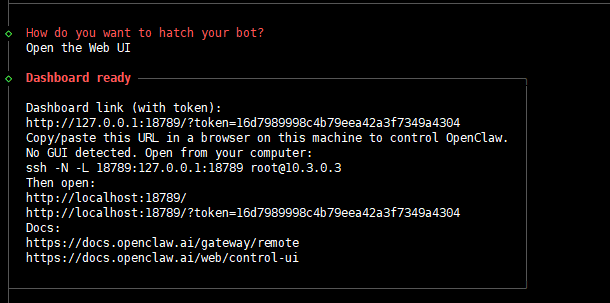
◆ How do you want to hatch your bot?
Select
Hatch in TUIto use it through the terminal. Later you can also configure the Web UI so that OpenClaw can be accessed through a web browser.
Finally, check the information output on the interface and save this information.
Accessing OpenClaw via Public Network
You do not necessarily need to expose it to the public internet. If you do not need Telegram integration or public WebUI access, you can skip this section.
If you have a domain name, it is recommended to bind the domain rather than exposing OpenClaw to the public internet through port mapping.
WebSocket
The WebSocket solution requires directly exposing the Gateway port, which is less secure and is only recommended for temporary testing.
If we need to connect social apps to the server, this step is required. If you are only configuring Feishu, you do not need to do this.
If you have a domain name for reverse proxy, exposing the WebSocket through a port is still not recommended.
Its architecture logic is as follows:
Message Channels (WhatsApp/Telegram/Discord/iMessage)
        │
        ▼
┌───────────────────────────┐
│          Gateway          │  ws://127.0.0.1:18789
│     (Single Control Plane)│
└───────────┬───────────────┘
              │
              ├─ Pi agent (RPC)
              ├─ CLI (clawdbot …)
              ├─ Chat UI (SwiftUI)
              └─ Other clients
Run the command to continue configuring OpenClaw.
openclaw configure
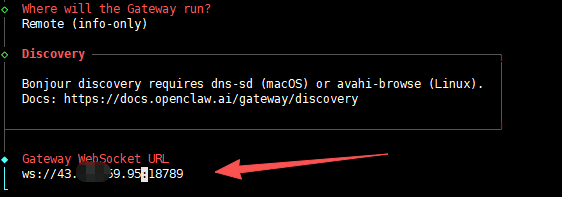
◆ Where will the Gateway run?
Select
◆ Where will the Gateway run?so that your OpenClaw running on the server can be accessed externally.
Next, note that the address shown under Gateway WebSocket URL can be modified. Find the public IP of your Tencent Cloud server and replace 127.0.0.1 with it.
◆ Gateway auth
Select
Token, meaning a credential is required to access OpenClaw.
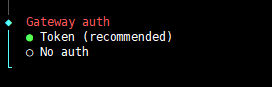
◆ Gateway token
Equivalent to entering a password. This password will be required to access OpenClaw later.
Stop and start using the insecure mode with --allow-unconfigured.
openclaw gateway stop
openclaw gateway --allow-unconfigured
Web UI
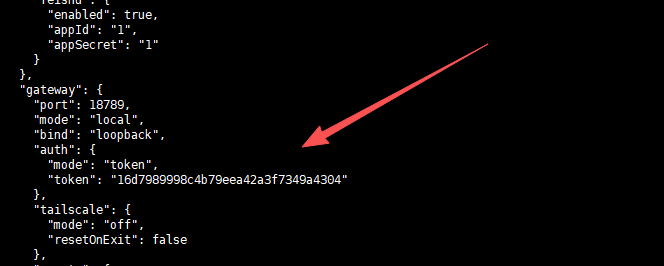
Change mode to remote and bind to lan in ~/.openclaw/openclaw.json, then restart OpenClaw.
Check the token:
cat ~/.openclaw/openclaw.json
When accessing through the public network, append &token=xxx to the URL.
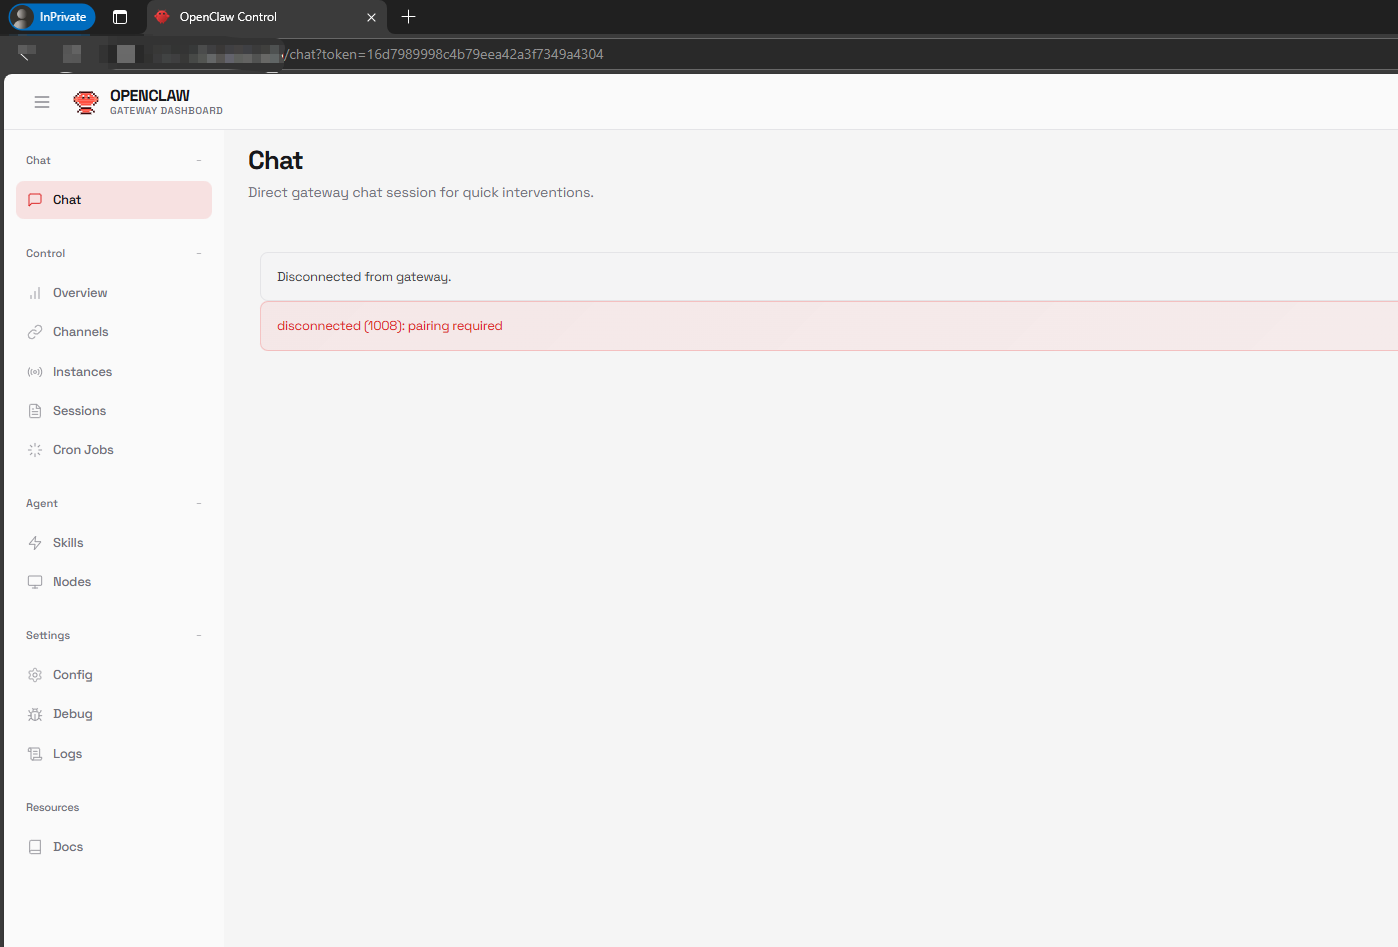
If accessing via the public network shows the pairing required error, it means the device needs authorization. Run the command to query the authorized terminal list:
openclaw devices list
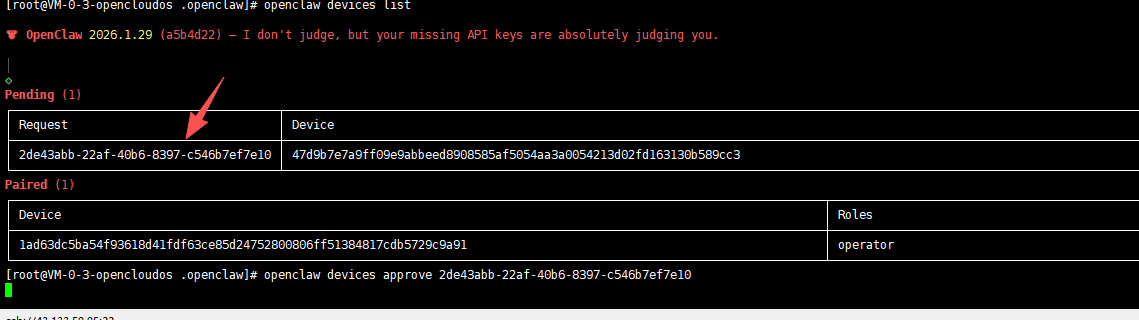
Find the Pending list, copy the Request value, and configure authorization.
openclaw devices approve b8eb70dd...
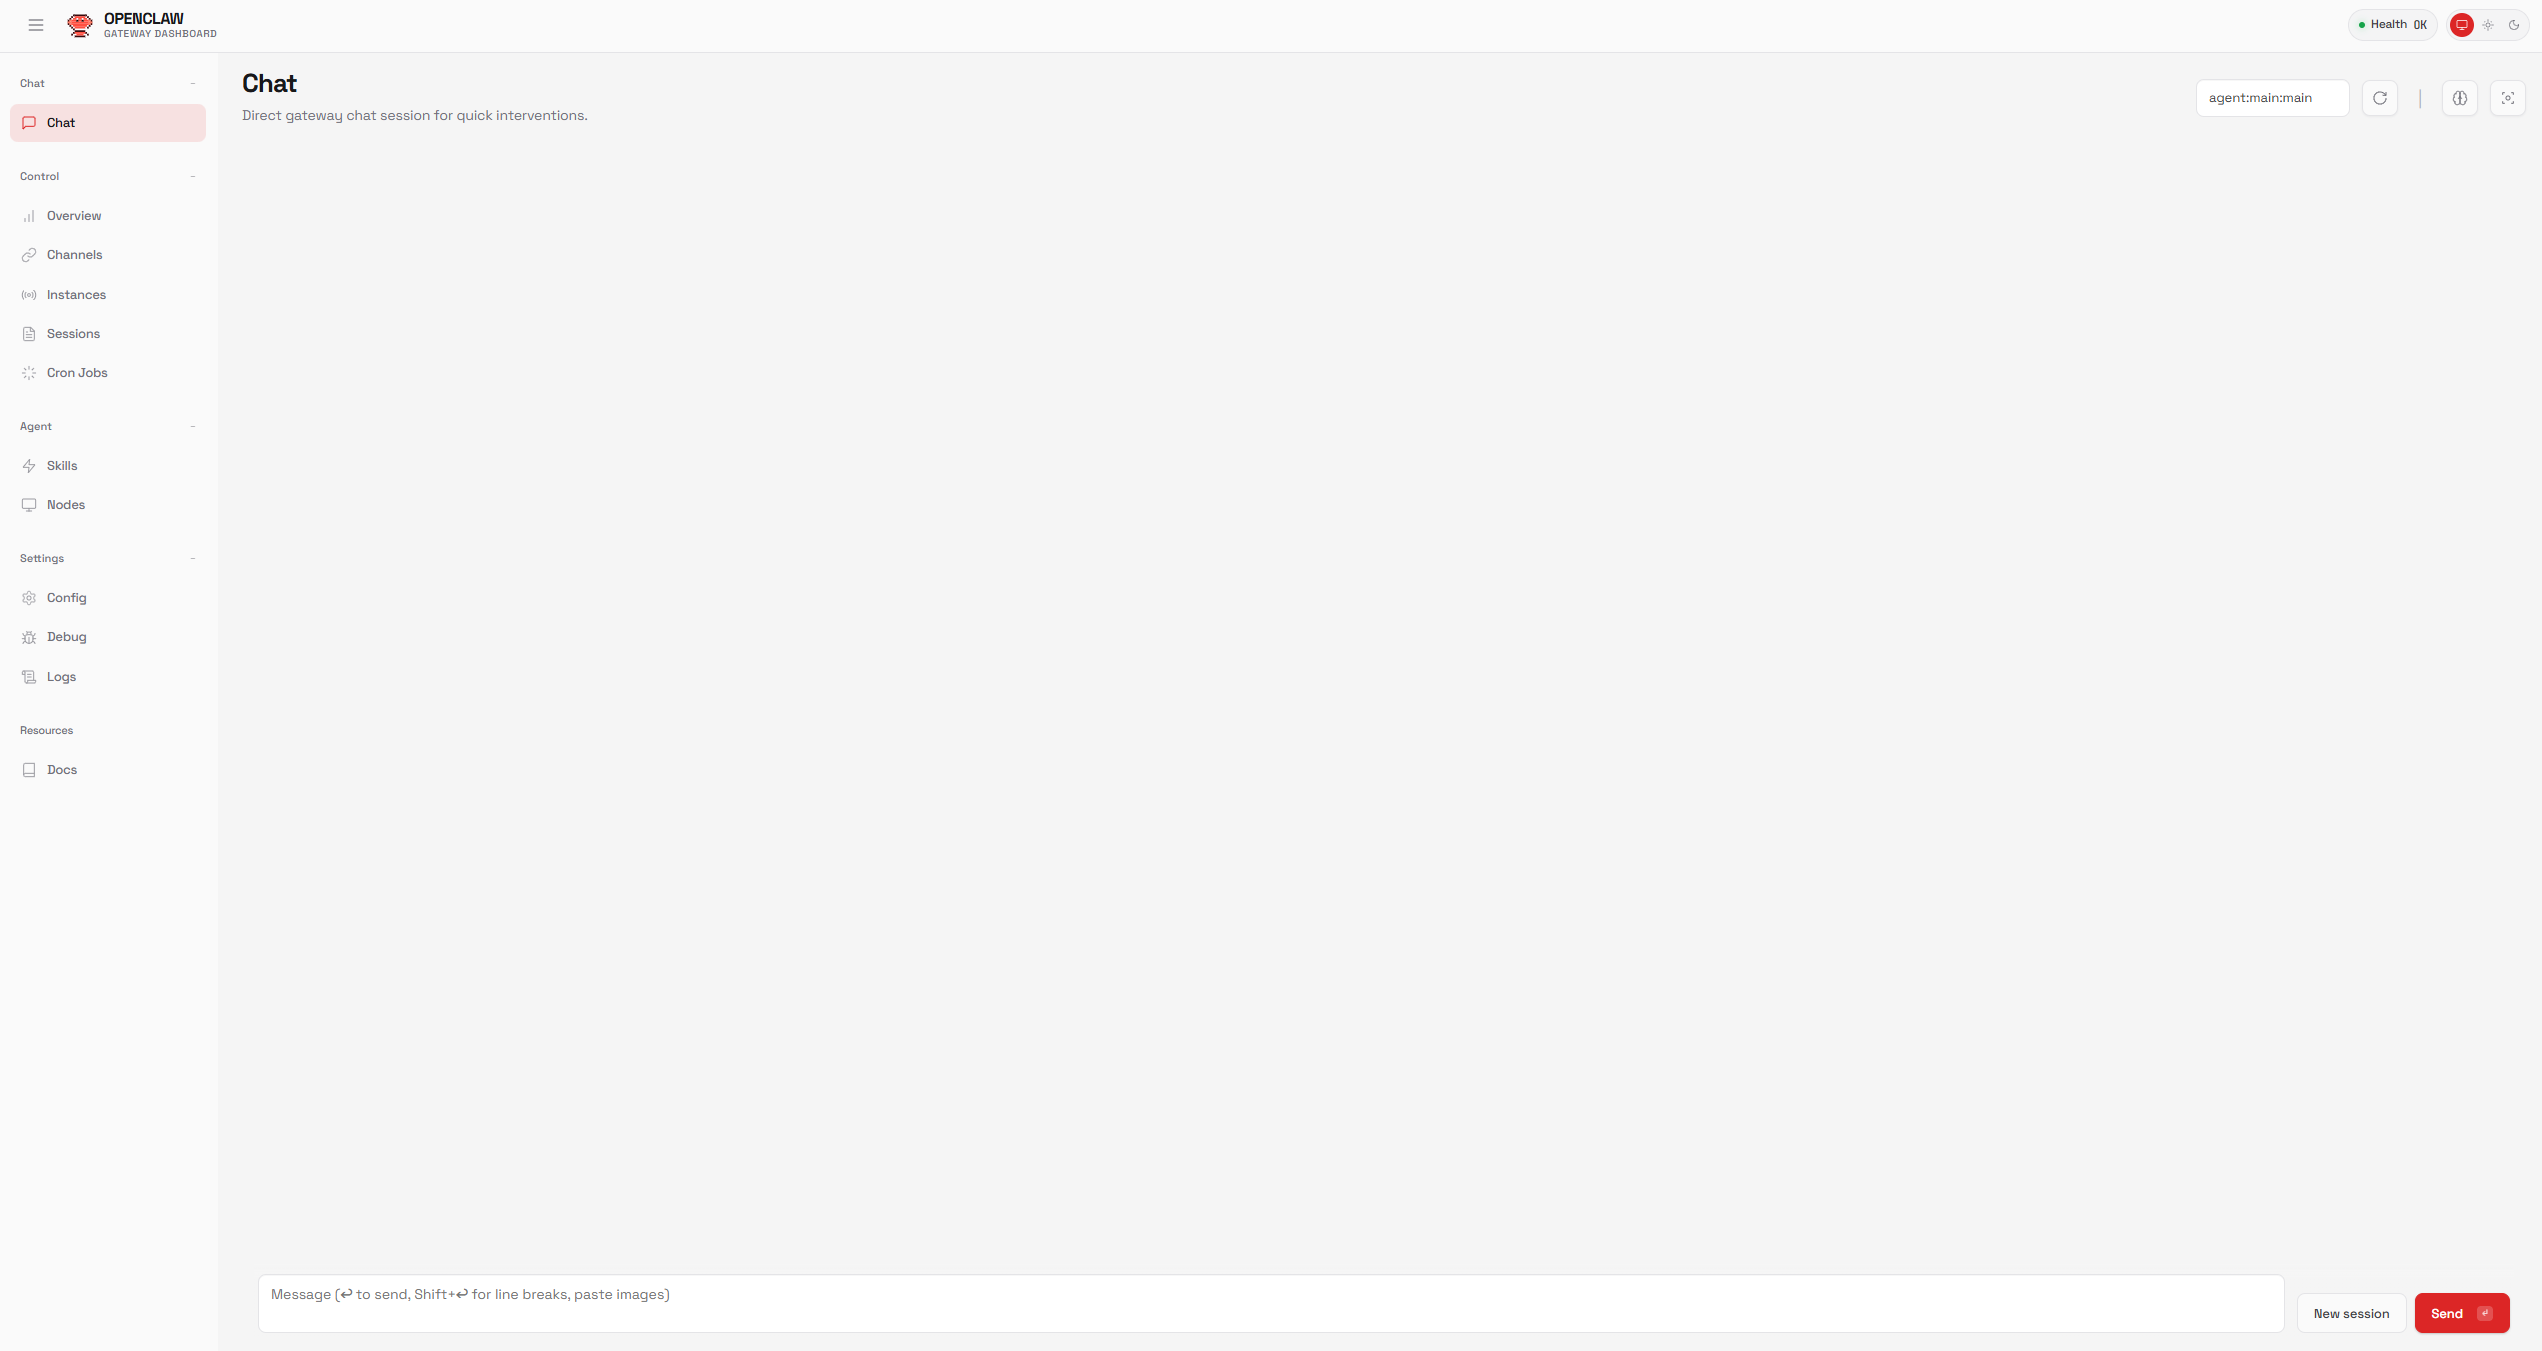
The interface can now be accessed normally.
Configure Models
Here we use the moonshot model as an example and skip the CLI configuration method, showing how to configure a custom model in OpenClaw using the configuration file.
Go to https://platform.moonshot.cn/console/api-keys to create a new key, and visit https://platform.moonshot.cn/playground to view supported models.
The Kimi Code model is also very powerful. You can get one to run coding tasks in the background. Purchase the coding model here: https://www.kimi.com/code
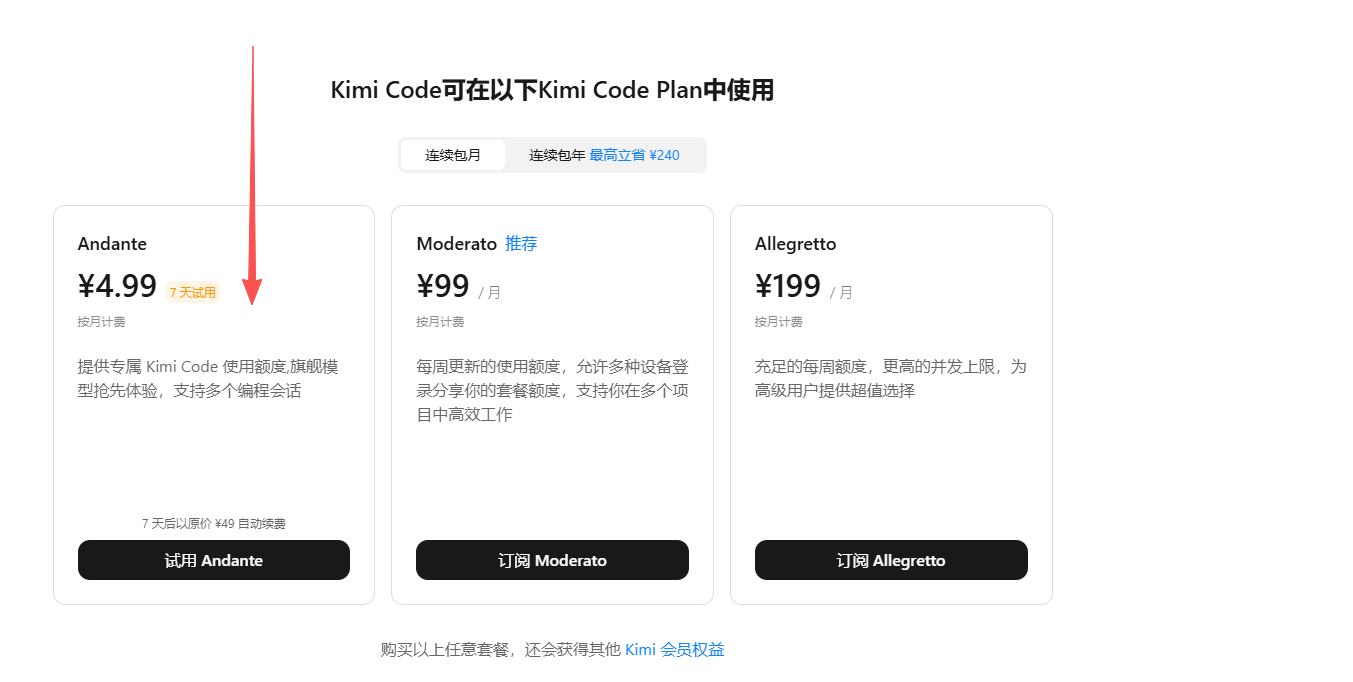
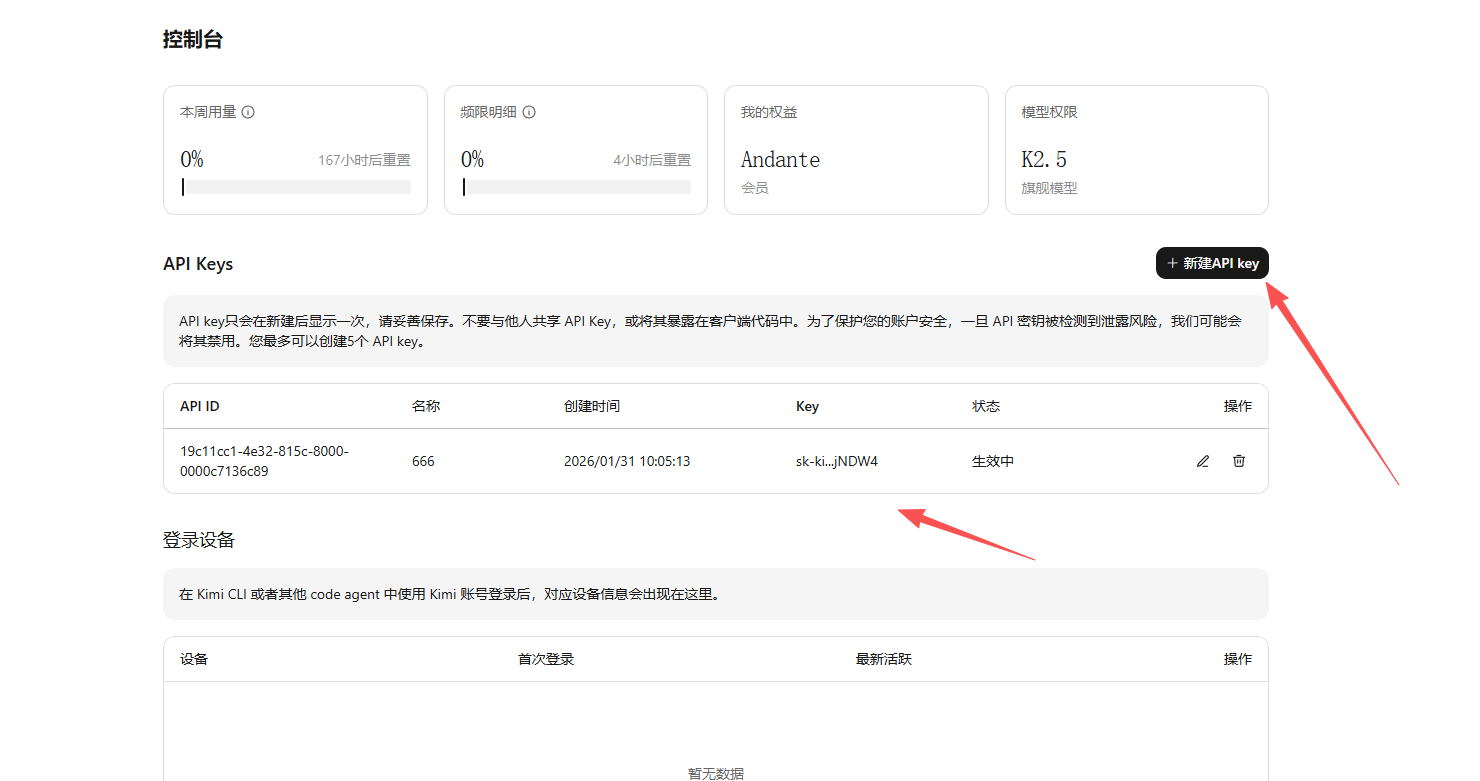
Create a new key: https://www.kimi.com/code/console?from=kfc_overview_topbar
Open ~/.openclaw/openclaw.json and replace or add the following model configuration:
Please replace
${MOONSHOT_API_KEY}and${KIMICODE_API_KEY}with your own keys.
{
  "agents": {
    "defaults": {
      "model": {
        "primary": "moonshot/kimi-k2.5"
      },
      "maxConcurrent": 4,
      "subagents": {
        "maxConcurrent": 8
      },
      "workspace": "/root/.openclaw/workspace"
    }
  },
  "models": {
    "mode": "merge",
    "providers": {
      "moonshot": {
        "baseUrl": "https://api.moonshot.cn/v1",
        "apiKey": "${MOONSHOT_API_KEY}",
        "api": "openai-completions",
        "models": [
          {
            "id": "kimi-k2.5",
            "name": "Kimi K2.5"
          }
        ]
      },
      "kimi-code": {
        "baseUrl": "https://api.kimi.com/coding/v1",
        "apiKey": "${KIMICODE_API_KEY}",
        "api": "openai-completions",
        "models": [
          {
            "id": "kimi-for-coding",
            "name": "Kimi For Coding"
          }
        ]
      }
    }
  }
}
Connecting other models compatible with the OpenAI API works in a similar way.
Restart:
openclaw gateway stop
openclaw gateway start
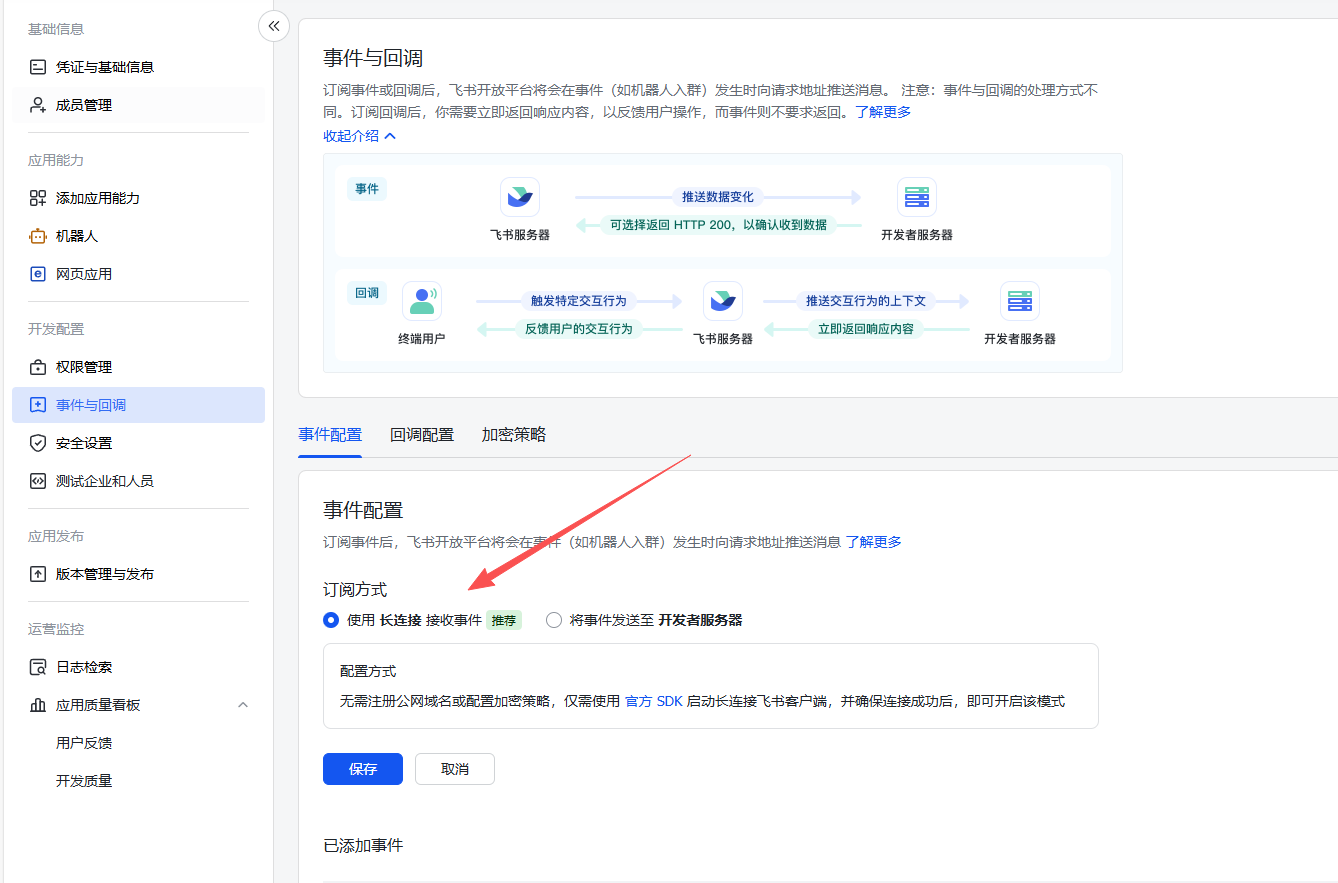
Configure Feishu Integration
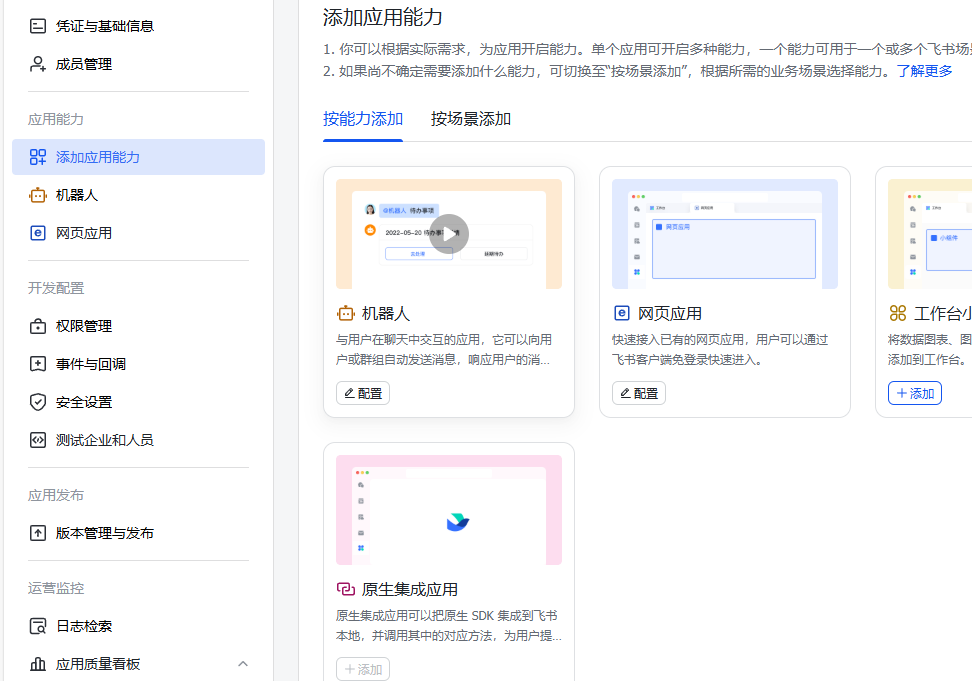
Open the Feishu application management console, add application capabilities, and select Bot.
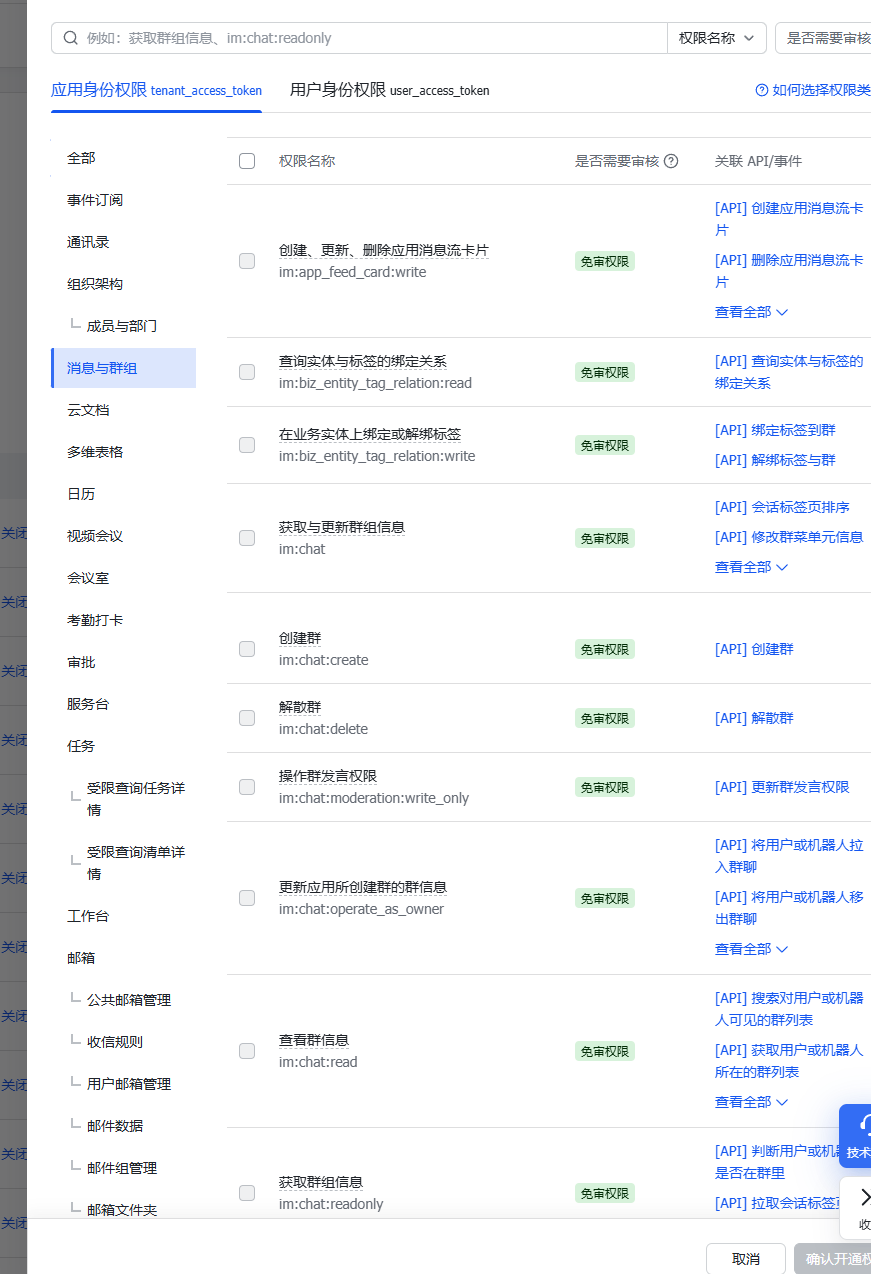
Configure permission management and enable the permissions for messages and groups.
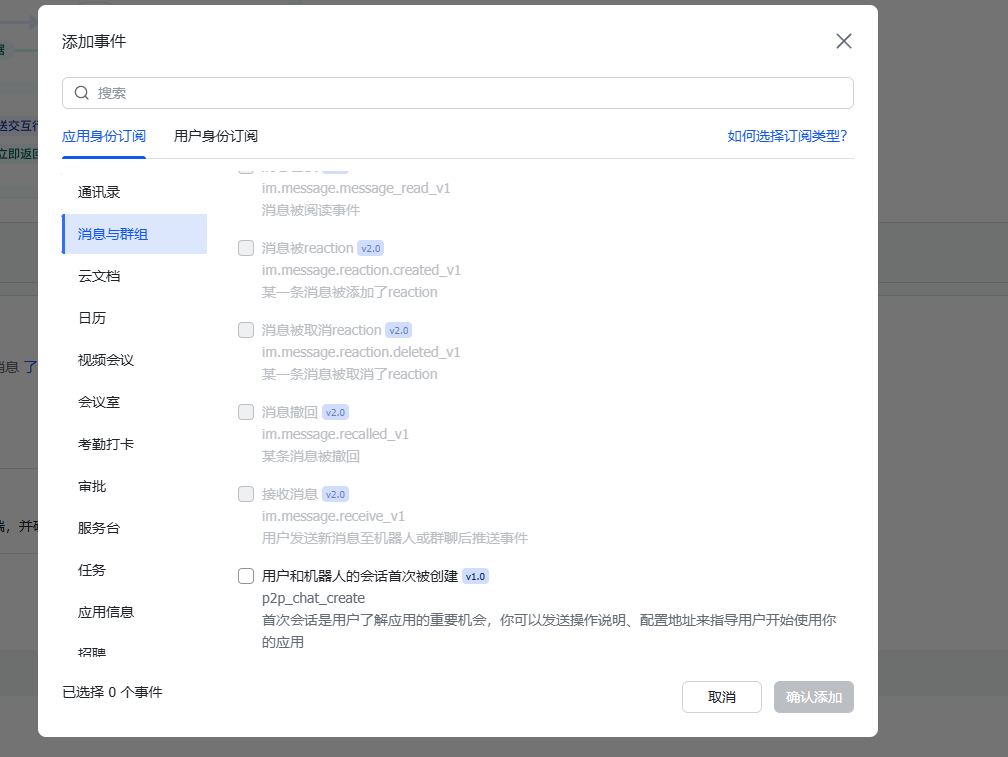
Configure events and callbacks, use long connections, and add message-related events.
Run the OpenClaw configuration command:
openclaw configure
Select Channels.

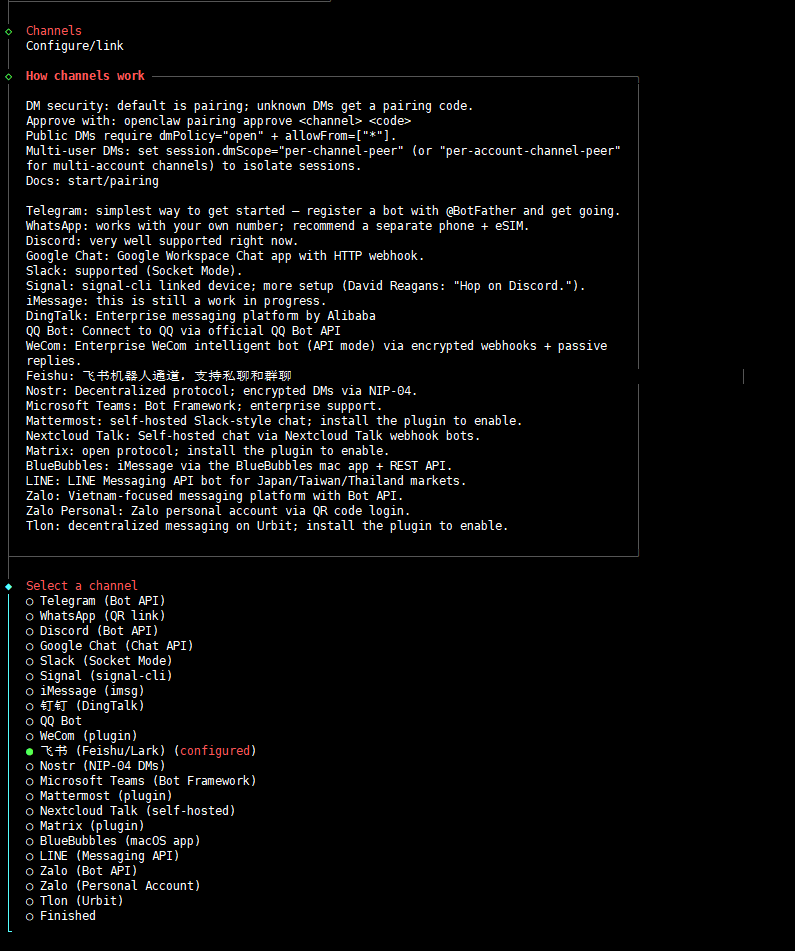
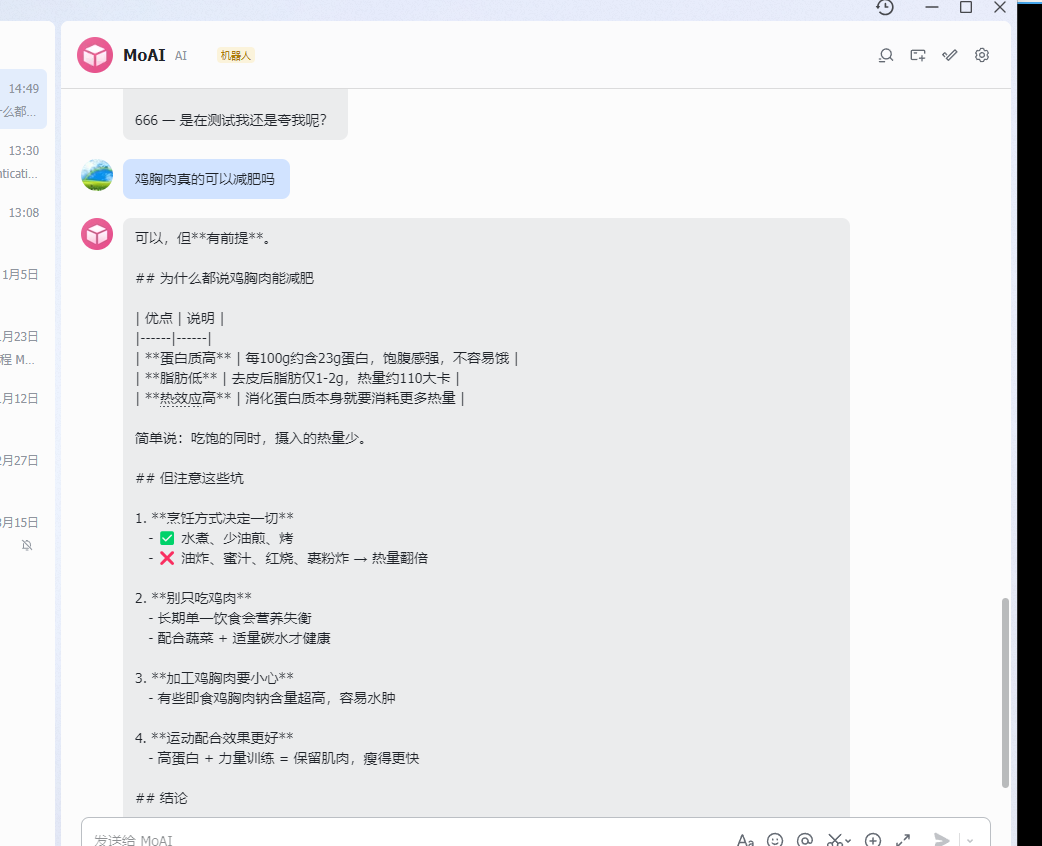
Fill in the Feishu App ID and secret as required. Then you can send messages to the bot in Feishu.

文章评论